


AR Image Tracking
Using Unity AR Foundation and ARKit XR Plugin 4.2.3


In the previous blog, we explored some brief about AR Foundation and ARKit XR plugin and also covered setup of AR development environment in iOS device.
Now, let's see how we can build an AR app demonstrating one of the basic AR Subsystem, Image Tracking.
Introduction
AR Subsystem package which comes with AR Foundation in Unity provides interfaces for various subsystems but implementations for these subsystems are provided as separate plugins(AR platform specific plugins or packages like ARKit for iOS and ARCore for Android).
These subsystems enables the functionality of detecting and tracking something on physical environment, for example Image Tracking Subsystem.
It attempts to detect 2D images in the environment that match stored in a reference image library.
Reference Image Library: A library where we keep those reference images.
Reference Image: A reference image is an image that the Image Tracking Subsystem attempts to find in the real world.
Rest of the terminologies will be discussed along the demo.
Our final output will look like this. (Ignore the broken screen)
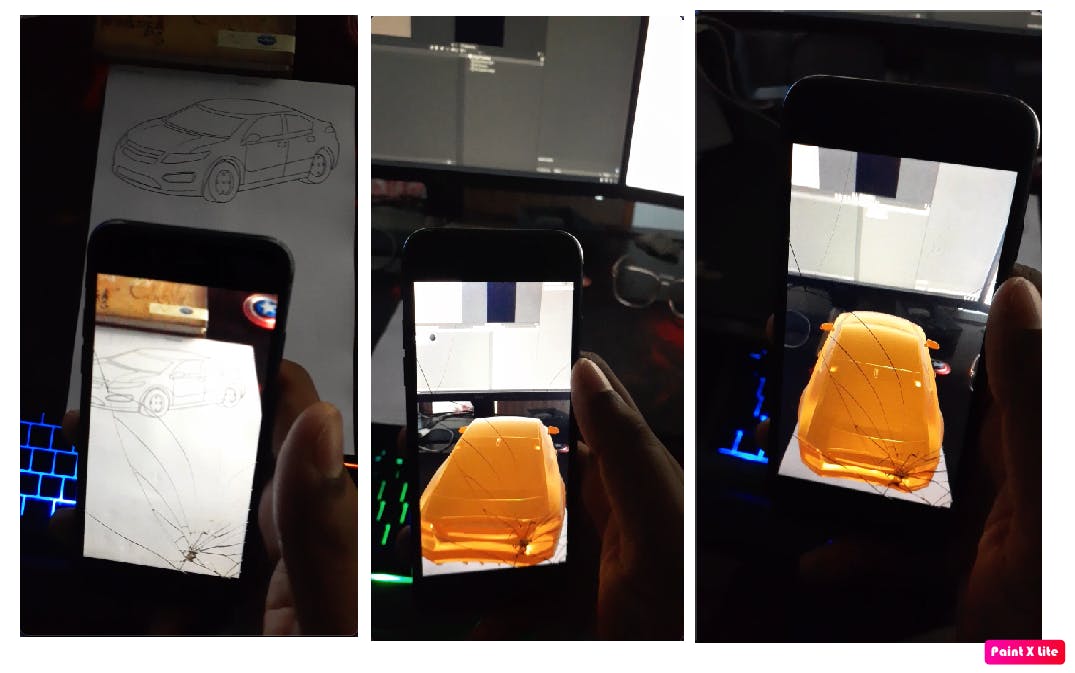
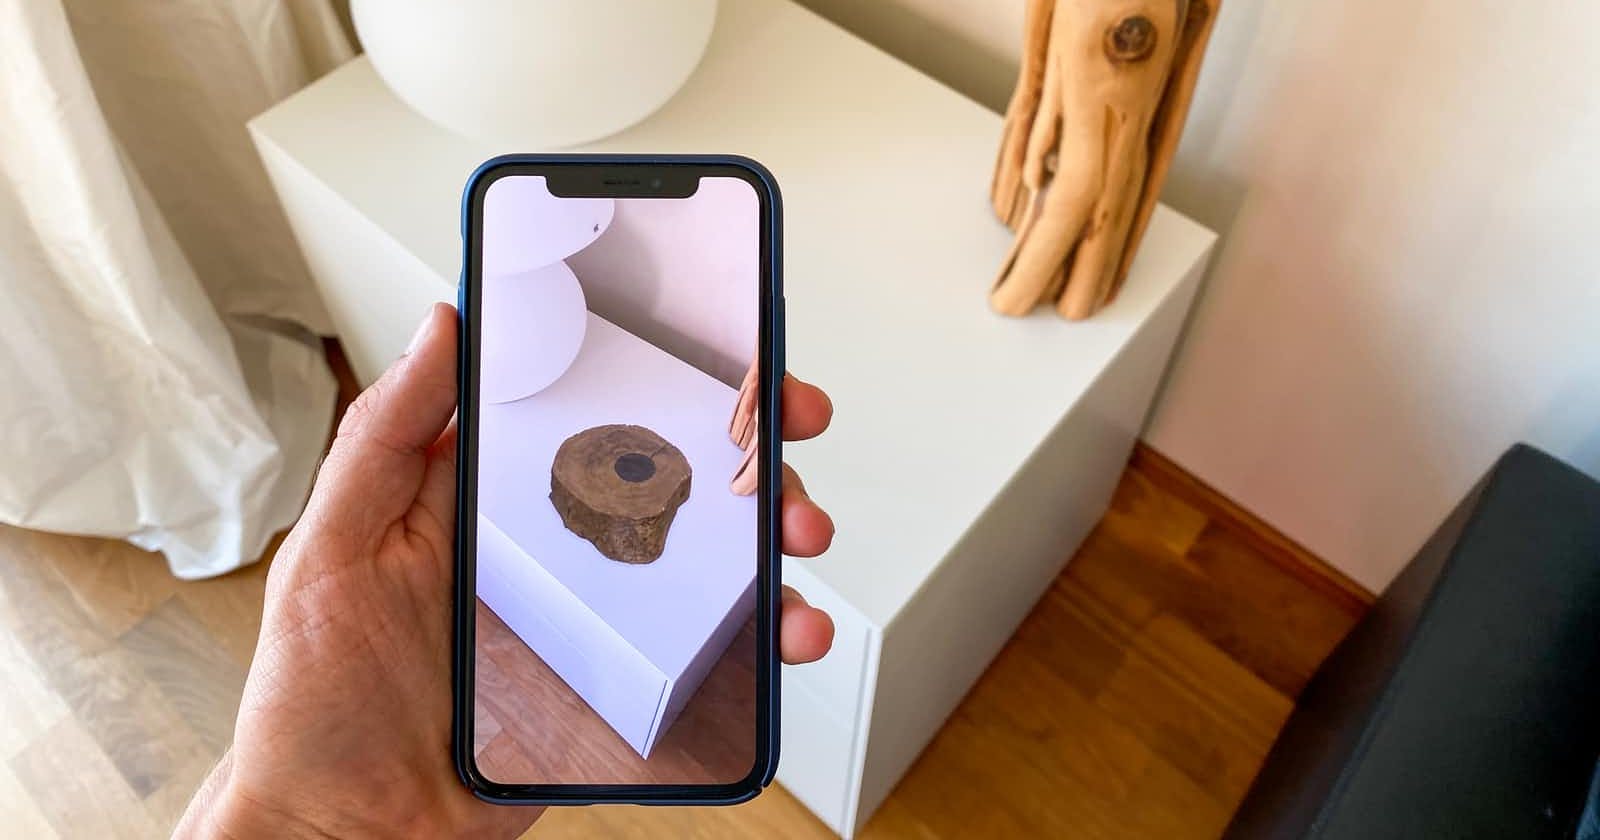
To begin, first decide what you want to place when image is tracked, I've placed a 3D Car over the tracked 2D Image of Car.
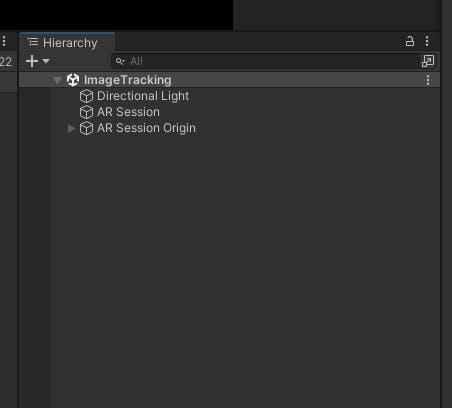
Create a project in Unity and choose name of your scene (Image Tracking) > Add AR Session and AR Session Origin, (as we did in the previous blog)
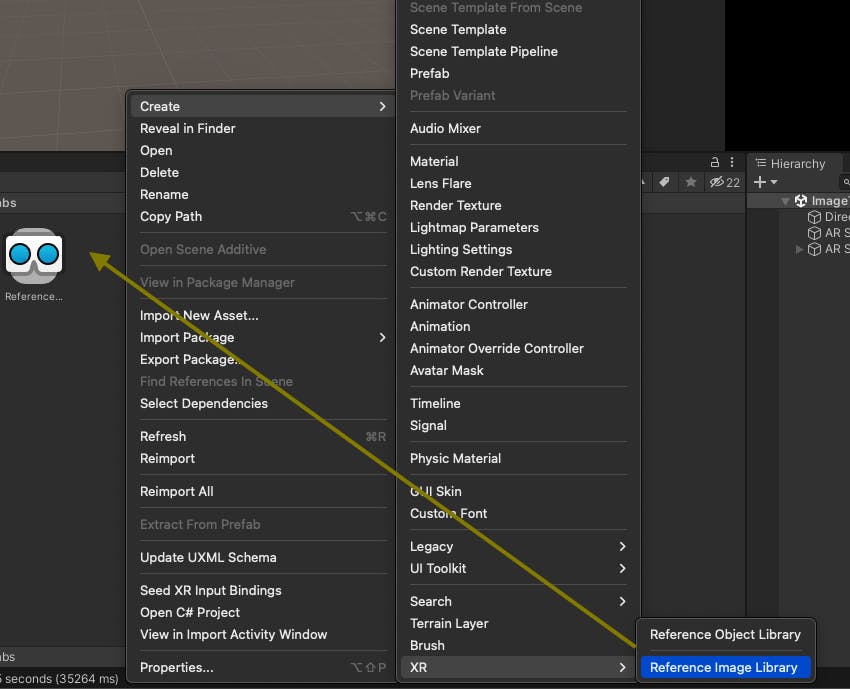
Now Add Reference Image Library to the Assets folder
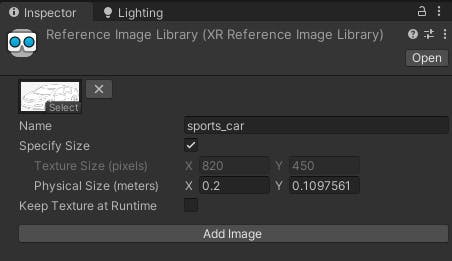
We would need to add those images into the Reference Image Library, so now click on ReferenceImageLibrary icon, it'll open up it's Inspector. Click on Add Image and drag the sports_car image.
Next, we need to tell our AR Session that this our Reference Image Library and if tracked that reference image then show our Car 3D view.
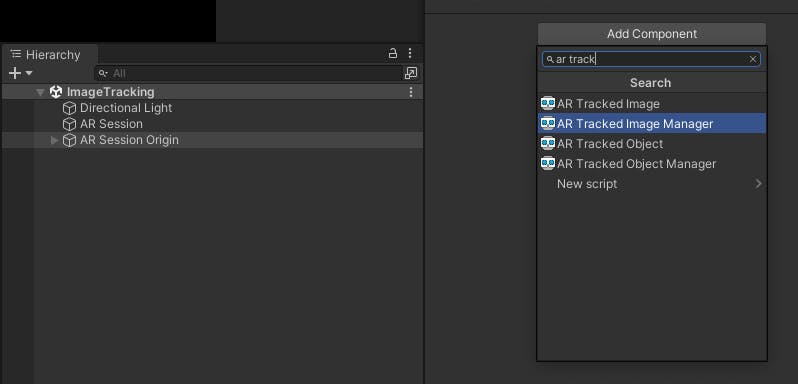
For that, add two components into AR Session Origin object, AR Tracked Image Manager and a C# Script to perform operations after tracking the image.
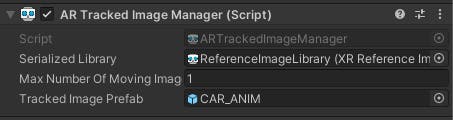
Open Inspector of AR Session Origin > Add Component > AR Tracked Image Manager
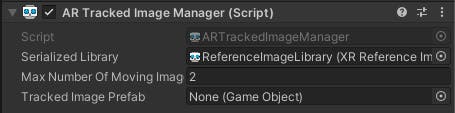
After adding just drag ReferenceImageLibrary from your assets folder into the Serialized Library field of AR Tracked Image Manager component.
Again, Add Component > Script or you can simply right-click on Assets > Create > C# Script, choose a name, say ImageTrackingScript.
double-click on ImageTrackingScript.cs file on assets folder and open into your favourite editor.
Import some required libraries at the top,
using UnityEngine.XR;
using UnityEngine.XR.ARFoundation;
Note : If you belong to coding background then follow along, or you can skip directly to adding 3D models as prefabs.
Then remove Start() and Update() functions from the class as we are not going to use both for now.
Now, inside our class, first declare required variables,
private ARTrackedImageManager aRTrackedImageManager;
arTrackedImageManager, it's the reference of the same component that we have added into the AR Session Origin, so we would need this to track and perform events accordingly. In this case we'll place an object.
Lets instantiate this variable first, so will write this inside Awake(), as when the scene loads Awake(); is the very first method which is called.
private void Awake()
{
    aRTrackedImageManager = FindObjectOfType<ARTrackedImageManager>();
}
Now, we need to bind and unbind our 3D model based on the Tracked Image or Image Change events, so perform these inside OnEnable() and OnDisable() since these will be called every time the script is activated.
 private void OnEnable()
 {
     aRTrackedImageManager.trackedImagesChanged += OnImageChange;
 }
 private void OnDisable()
 {
     aRTrackedImageManager.trackedImagesChanged -= OnImageChange;
 }
OnImageChange is a custom method, we will create that takes ARTrackedImagesChangedEventArgs as a parameter. Inside this function using args, we can easily track the events like if image is added, updated or removed.
private void OnImageChange(ARTrackedImagesChangedEventArgs args)
{
      foreach (ARTrackedImage trackedImage in args.added)
      {
          // Do something
      }
      foreach (ARTrackedImage trackedImage in args.updated)
      {
          // Do something
      }
      foreach (ARTrackedImage trackedImage in args.removed)
      {
          // Do something
      }
}
Save the script, now back to Unity. We need to attach the script to the AR Session Origin, so drag the script and into its inspector.
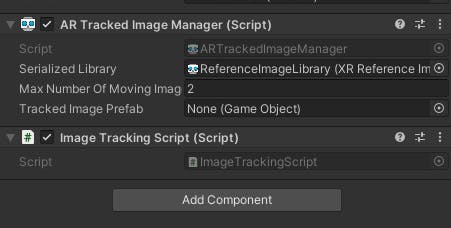
Last but important thing to include that to show our 3D model when the image is tracked. So for that I've used one 3D car, you can find free 3D models here, just create a prefab of the object and drag into the Tracked Image Prefab field of AR Tracked Image Manager component.
Finally, Go to File > Build Settings > Switch Platform to iOS > Build
Open Xcode by clicking on xcodeproj file generated in your Build folder. Configure your Signing & Capabilities, then Product > Build and Run.
Voilà ! We made it !
If you followed until now then thank you so much for your patience. Comment below if you find some obstacles while doing this demo or any configuration related issues (because I faced), I'll happy to assist you.
Keep Building Yourself